

This post introduces you to Lockatmo – a small home project displaying Netatmo weather data on an ePaper.
I started using my Netatmo weather station (#reklame #marketing) in 2017, so nearly 8 years ago. The device I bought at that time is still active and nowadays has two additional indoor devices as well as a rain measurement station. It’s still up an running!
It comes integrated with Apple Homekit, Amazon Alexa and Google Assistant.
The Netatmo Weather mobile application is decent and it actually displays all of the collected weather data in a nice format. There is also a Web App for it that you can access. For a nerd like me, thats all I need! 🙂
But… not everyone in my family is a nerd and sometimes pulling out a mobile device takes time…that you don’t have, because you want to know the temperature NOW and not in 3 seconds…
…and Legrand (Netatmo manufacturer) does not yet have an “official” physical display… (if you know one, please send me a message!)
_And as I am a engineer and builder, I built something on my own 😉
The initial, simple version
I built an initial version of this in 2018, here’s the architecture diagram for it:
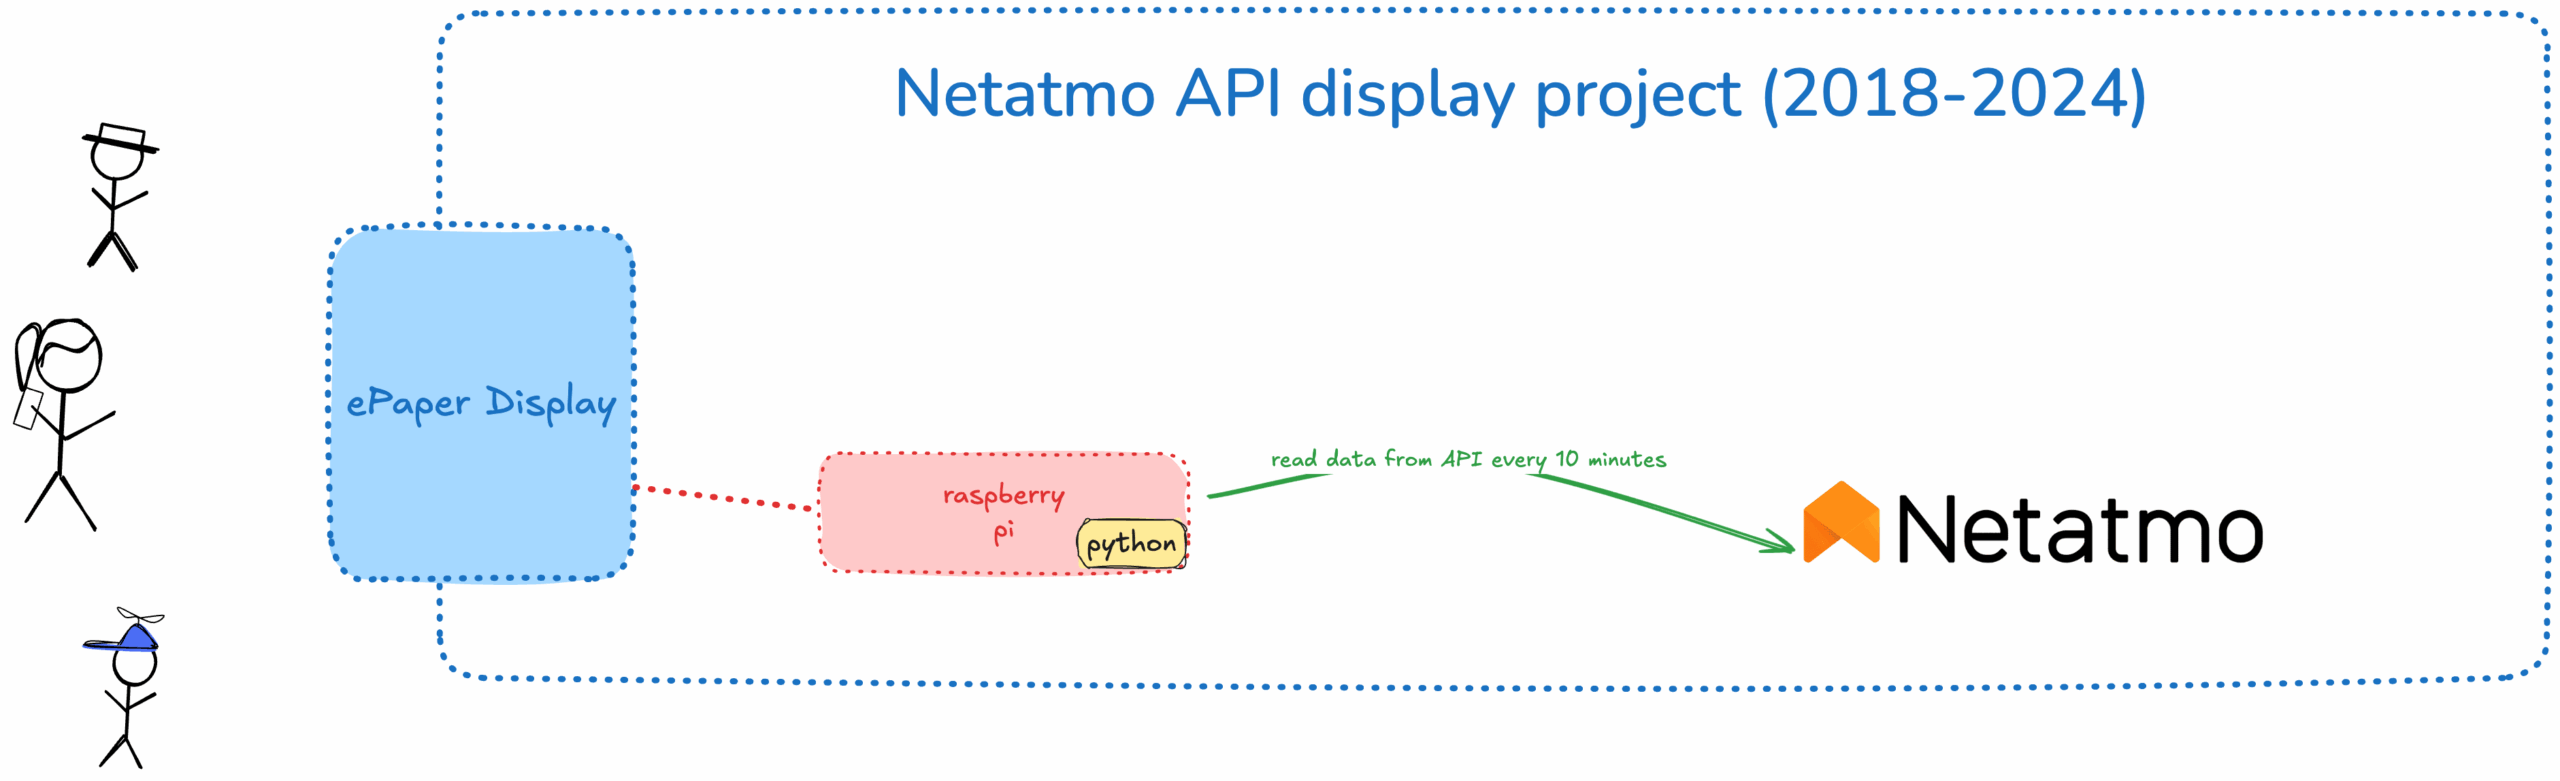
As you can see, that one was pretty simple:
A small python script, accessing the Netatmo API using an application and a secret, retrieving the data and using an ePaper from Waveshare to display the basic information. I was using the netatmo-api-python Open Source library to access the API.
This worked very well until 2023, when Legrand decided to enforce the usage of OAuth2 – see documentation for the usage of the API. This means, I also needed to move to using OAuth2 – which I was able to initially do using the same library.
But then, in 2024, Legrand changed something on the API…
…and the OAuth2 tokens started to expire regularly, with errors that I was not able to understand at that time… As my Python skills are worse than my Typescript skills and I was not able to debug the Python script as required, I decided to move the project to Typescript using the Open Source project netatmo-api-client. This project also works great and does exactly what it should, but I was not able to fix the expiring tokens problem.
Every time the tokens expired, I was not directly able to access the log files and problems on the raspberry pi and thus I was not able to get down to the root cause.
So, I decided to move ahead and build a Cloud native, serverless solution!
The current version and how I solved the expiring tokens
So, I started off building this solution with the simplest possible implementation:
- A regularly triggered AWS Lambda function would call the Netatmo API and store the data in DynamoDB
- The python script on the raspberry pi should call an API Gateway that returns the Netatmo data through lambda
And well… the same problem happened again, now in AWS Lambda…
But now, I was able to triage this better problem better using CloudWatch!
And with that new possibilities, I was able to find out that my calls where regularlyfailing with a Usage limit exceeded error message and because of that all sub-sequent API calls returned a 403 error message…
The only way to fix that, was to (manually) log into the Netatmo Developer Homepage to create a new token and update the information in the Systems Manager Parameter Store.
I actually needed to do that regularly… and as I am always too busy and lazy… this resulted in multiple hours or days of “downtime” of the service… and the display was showing old data…
So, my clients (my family), was once again not able to use this properly…
The new architecture
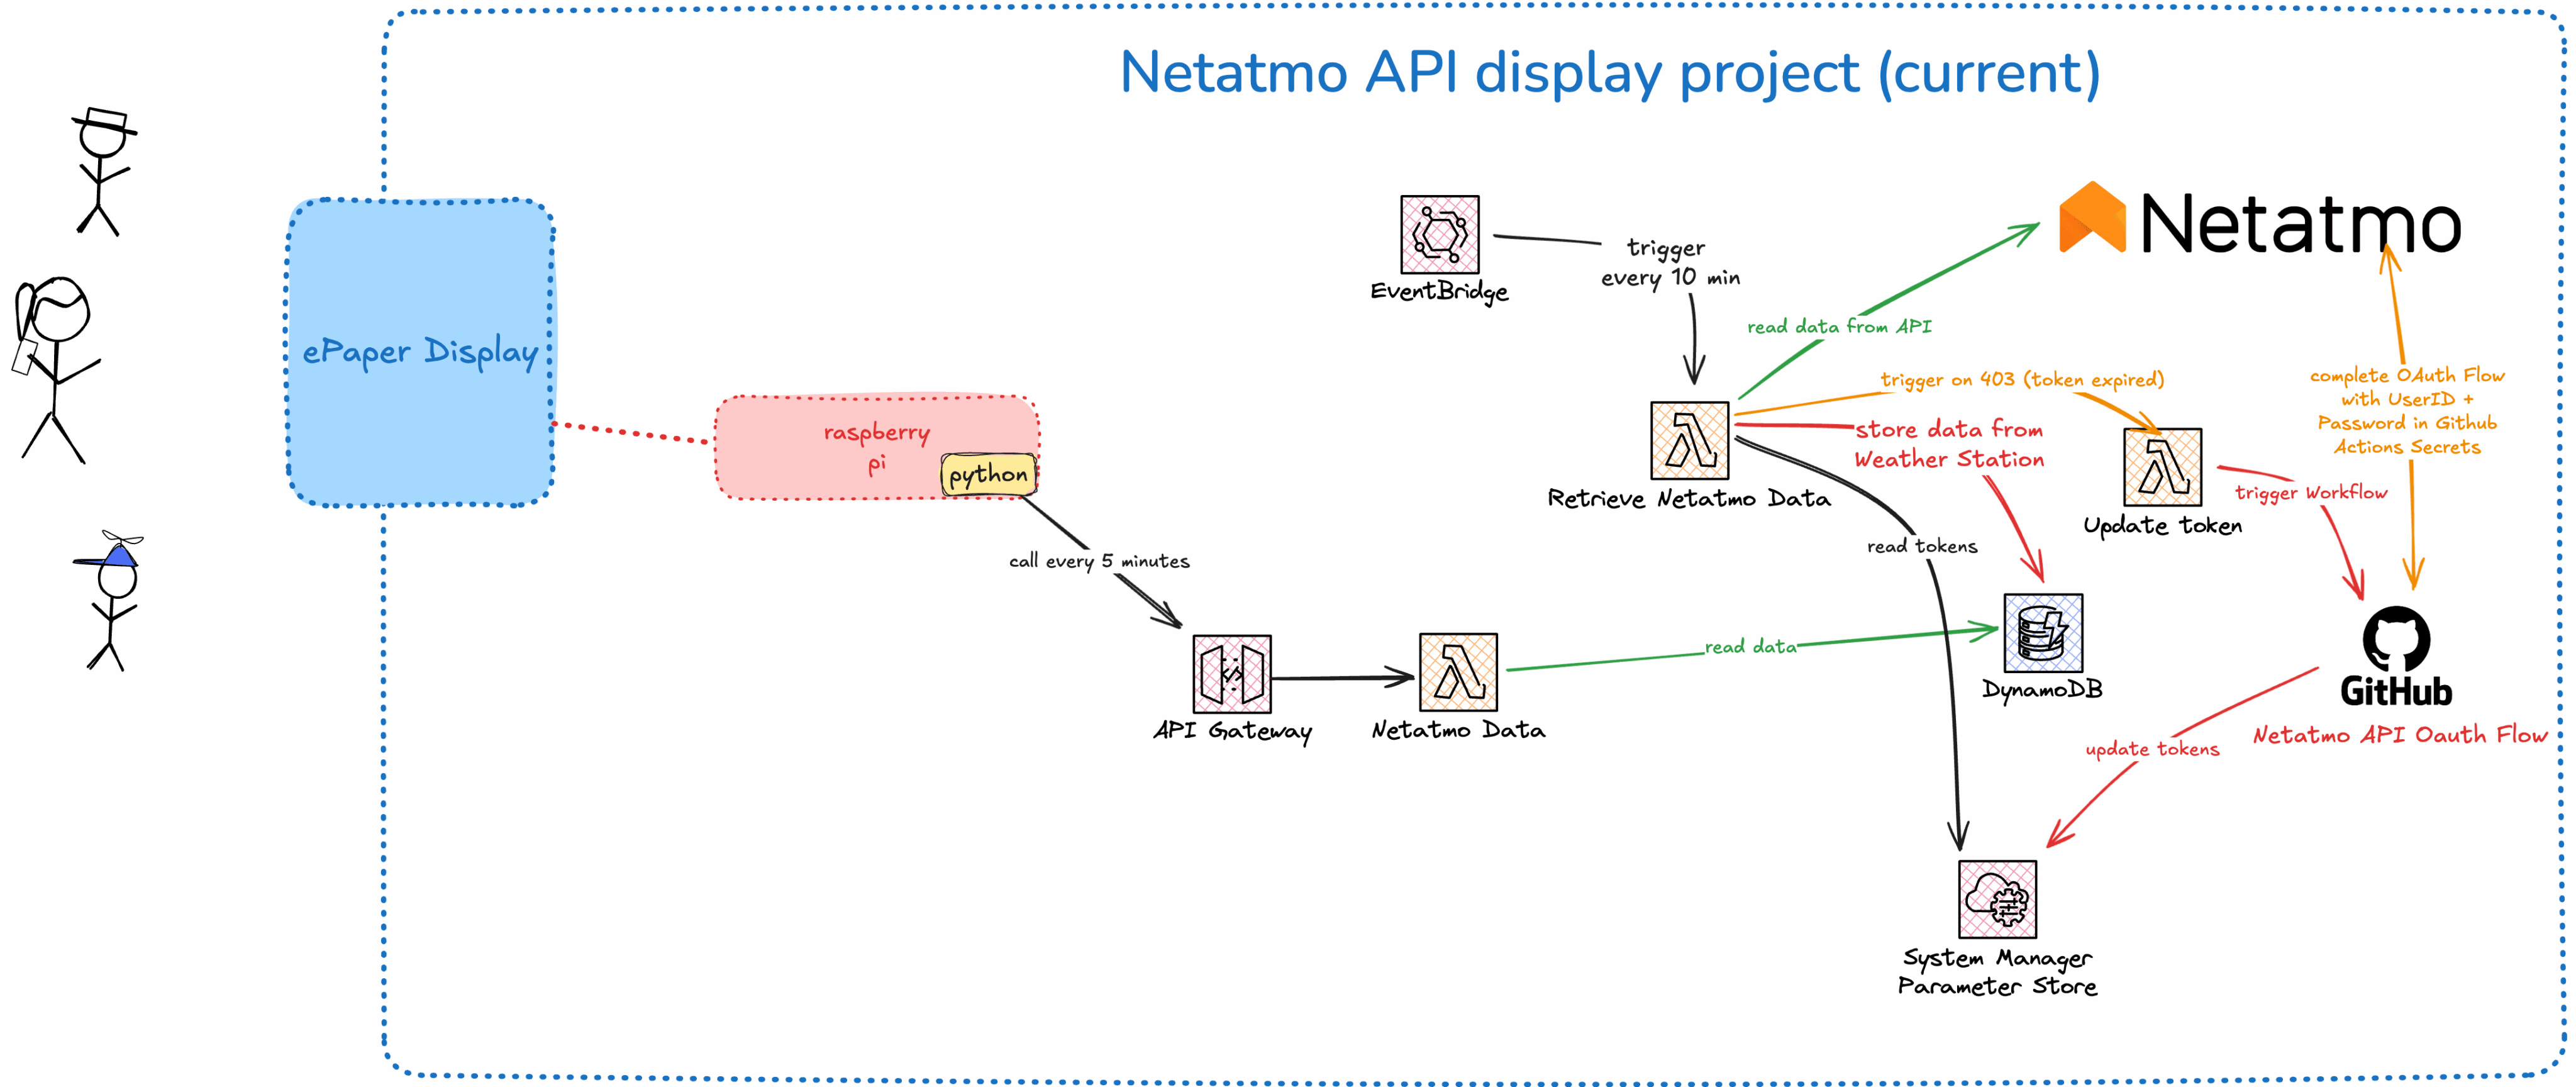
As you can see, this is a “tiny” bit more complicated than before 🙂
It took me a while (and a few /dev and prompts with Amazon Q Developer) to implement it.(If you want to know more about Q, watch this video…)
Now, if the AWS Lambda function that retrieves the data from Netatmo, will continue to fail with an 403 error.
If it does, it will now automatically start a Github Actions Workflow that is able to run a full “OAuth flow” using Playwright, simulating user actions in the OAuth flow!
My family is now happy as the data is always up to date on the physical display :-).
Benefits and next steps
So, what are the benefits of this approach?
I finally do not need to update the tokens regularly manually anymore and the project “self-heals” once the tokens expire.
In addition, I also get my “own” history of the data retrieved from Netatmo which I can potentially analyze if I want to. I’m not doing it yet, but who knows? 🙂
And what are the next steps?
Everything that I’ve built so far is written in code, using Github Actions to deploy the required infrastructure.
The only things needed to be set up manually:
- the OIDC access for Github Actions to the AWS Account
- the Netatmo App to retrieve clientId, clientSecret and tokens
- set up secrets in Github and secrets and tokens in the Systems Manager Parameter Store
The code is not yet open source…
Would you be curious for me to make this aailable on Github?
Please let me know in the comments or reach out to me on LinkedIn!
Views: 49