
Recent Posts
View all posts
May 27, 2025 • Lockhead
Launching my new homepage with Amazon Q Developer

December 9, 2024 • Lockhead
Gitlab and AWS announce a collaboration - what it means for AWS DevTools and who gains from it
December 4, 2024 • Lockhead
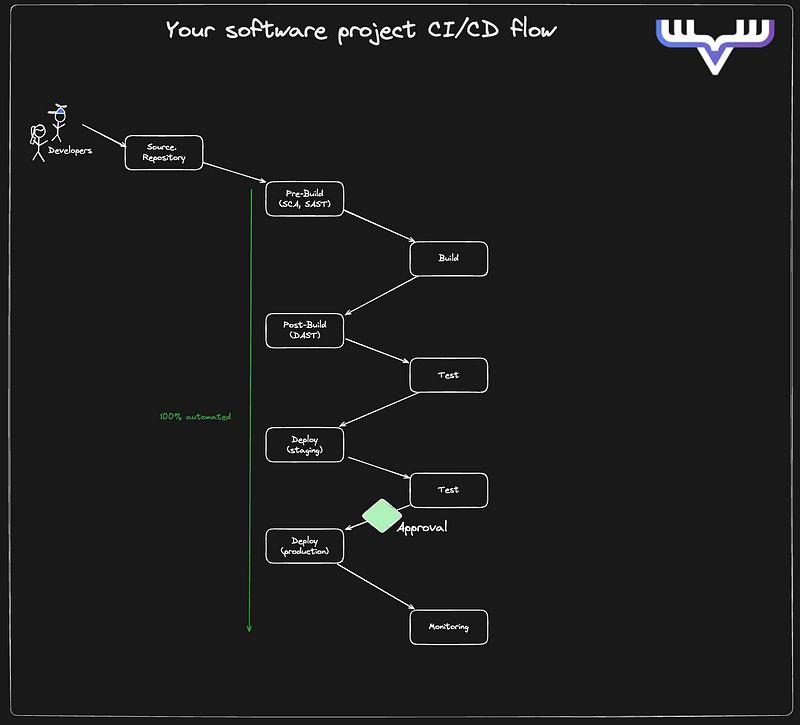
The modern CI/CD toolbox: Strategies for consistency and reliability

December 2, 2024 • Lockhead
A first look at AWS EKS Auto Mode - hits, misses and possible improvements
Subscribe to my Newsletter
Stay updated with the latest articles and news. No spam, I promise!